Adding Orders Requested by Users

  1. Select FILE>New>Catalogue

  2. The Catalogue screen is divided into TWELVE Tab Sheets. Select Acq’ns tab

  3. Enter Title (this is mandatory)

  4. Select ‘On order’ from Status field pop-up list

  5. Enter other bibliographic details (optional at acquisitions stage)

Tip:

  • Refer to Cataloguing for detailed instructions on how to complete a full Catalogue record.

  1. Right mouse click on the order summary window towards the bottom of the Acq’ns tab screen and select Add Orders

  2. The system will generate a save confirmation prompt. Click YES

  3. The Orders screen is divided into FIVE Tab Sheets. Select the Orders tab

  4. A system generated Order No. is displayed. Enter an alternative Order No. if required

Tips:

  1. The associated catalogue Record No is also displayed

  2. Order Status defaults to ‘On Order’. Select an alternative status option from the Order Status pop-up list if required

  3. Order Date defaults to today’s date. Click on the adjacent calendar icon  and select an alternative date if required

  4. Delivery Date defaults to a date two months from the default Order Date. Click on the adjacent calendar icon  and select an alternative date if required

  5. Date Due and Renewal Date are used for serial subscription orders only

  6. Enter any Vendor Instructions (instructions for the supplier)

  7. Select a Vendor ID from the Vendor look-up list.

Tip:

  • If the required the vendor does not appear in the Vendor pop-up list then refer to Vendors for detailed instructions on how to create a new vendor record.

  1. Select payment method from the Pay By pop-up list

  2. Enter Estimated Cost. This value is for information only and is not used in budget calculations. Do include currency symbols, for example ‘$’

  3. Select Currency from the Currency pop-up list. This value is for information only and does not convert foreign currency into Australian dollars

  4. Enter Quantity of items ordered

  5. Enter Notes if required

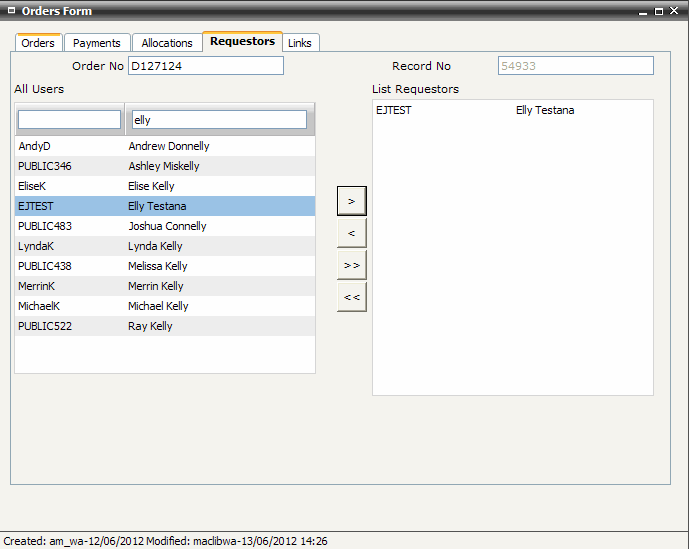
  6. Select the Requestors tab screen

  7. Begin typing the required user name or ID into the All Users text boxes. The window below displays an alphabetical list of user names and operates as a ‘word wheel’. Entering characters in the All User text boxes moves you through the list to the closest matching position.

  8. Click to copy selected users from the All Users window to the List Requestors window. Click to copy all users to the List Requestors window. Continue to add users to the Requestors list as required. Use the [Ctrl] or [Shift] keys in conjunction with a left mouse click to select more than one user

Click to remove a selected user from the List Requestors window. Click to remove all users from the List Requestors window

  1. You may choose to pre-process the payment at this stage to record the amount as committed expenditure against a selected fund, or alternatively, allocate an order amount to a fund/s when paying the invoice

Tips:

  • Allocating funds, or pre-processing the payment, at the same time that the order is placed provides a more accurate and timely record of committed and available Library funds.

  • Refer to Funds Management for detailed information on managing the Library Budget, including pre-processing payments.

  1. You may also optionally choose to add a link to electronic documentation associated with an order, for example the user email requesting the item or the original quote from a supplier. Select the Links tab screen to add a link to an electronic document or web site

Tip:

  1. Close and save the Order record

  2. A record of an order requested by a user is also displayed on the associated PATRON>Financial tab screen

Tip: