FIRST WebAdmin Help Version 2.16 © 2012 FIRST Software Solutions Pty Ltd
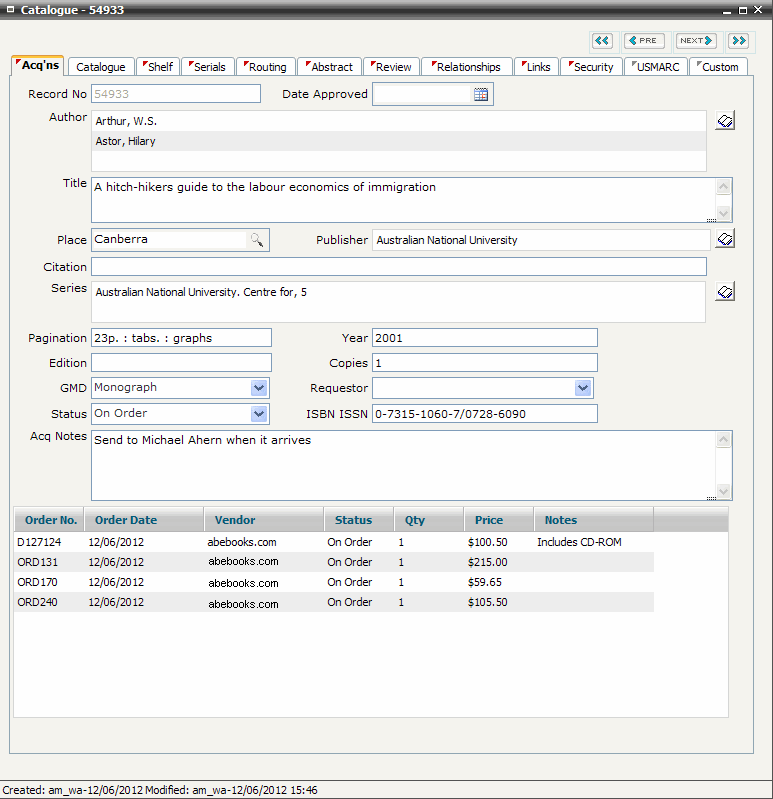
Right mouse click on the order summary window towards the bottom of the Acq’ns tab screen and select Add Orders
The system will generate a save confirmation prompt. Click YES to save the Acquisitions (Catalogue) record
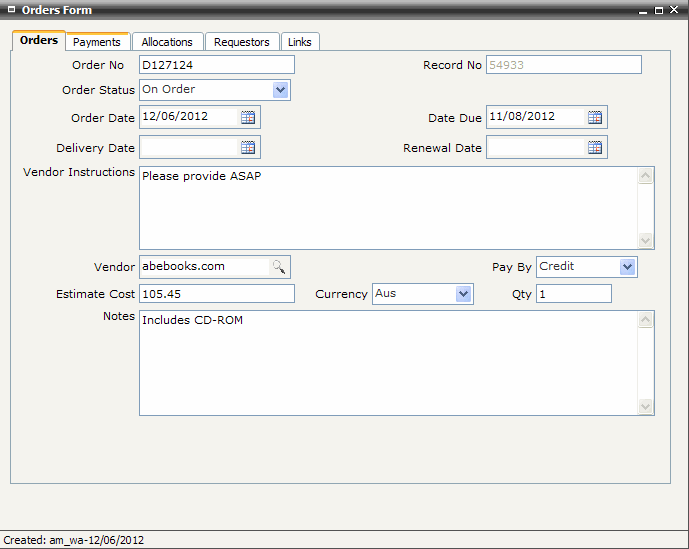
The Orders screen is divided into FIVE Tab Sheets. Select the Orders tab
A system generated Order No. is displayed. Enter an alternative Order No. if required
Tip:
|
The associated catalogue Record No is also displayed
Order Status defaults to ‘On Order’. Select an alternative status option from the Order Status pop-up list if required
Order Date defaults to today’s date. Click on the adjacent Calendar icon and select an alternative date if required
Delivery Date defaults to a date two months from the default Order Date. Click on the adjacent Calendar icon and select an alternative date if required
Date Due and Renewal Date are used for serial subscription orders only
Enter any Vendor Instructions (instructions for the supplier)
Type in part of the vendor name/ID into the Vendor field and click on the magnifying glass icon to filter the results in the Vendor look-up list. Double click on the vendor in the results to select them as the vendor for this order. Alternatively, click on the magnifying glass without entering any terms to retrieve the full list of Vendors
Tip:
|
Select payment method from the Pay By pop-up list
Enter Estimated Cost. This value is for information only and is not used in budget calculations. Do include currency symbols, for example ‘$’
Select Currency from the Currency pop-up list. This value is for information only and does not convert foreign currency into Australian dollars
Enter Quantity of items ordered
Enter Notes if required
You may optionally choose to pre-process the payment at this stage to record the amount as committed expenditure against a selected fund. Select the Payments tab screen to pre-process the payment
Tips:
|
You may also optionally choose to associate an order with a requesting user. Select the Requestors tab screen to associate an order with a user
Tip:
|
You may also optionally choose to add a link to electronic documentation associated with an order, for example the user email requesting the item or the original quote from a supplier. Select the Links tab screen to add a link to an electronic document or web site
Tip:
|
Close and save the order record
You may also optionally choose to print an order letter or send an order email to the supplier
Tips:
|

